🌿 BOTANY – Green Nature v7 🌿

Modern educational application for Windows 10 and 11

Methodical support

Asteraceae – teaching support

This teaching guide shows how the Botanika – Green Nature application can be used to deliver a clear and effective lesson focused on plants of the Asteraceae family. The lesson combines explanation, work with visual material, activating elements, and knowledge checking within one environment.

Topic Asteraceae
Time 45 minutes
Format Explanation + activity + test
Usage Interactive whiteboard and student devices

Quick start

  1. Launch the Botanika – Green Nature application.
  2. From the main menu, open the section “Dicotyledonous plants” → “Asteraceae”.
  3. Follow the individual phases of the teaching guide; depending on classroom equipment, you can choose either whole-class whiteboard teaching or independent student work.

Objectives

Recognising key features

Students identify the main features of Asteraceae plants and understand the structure of their inflorescence.

Botanical terminology

Students explain the terms capitulum, ray florets, disc florets, involucre, and achene.

Representatives of the family

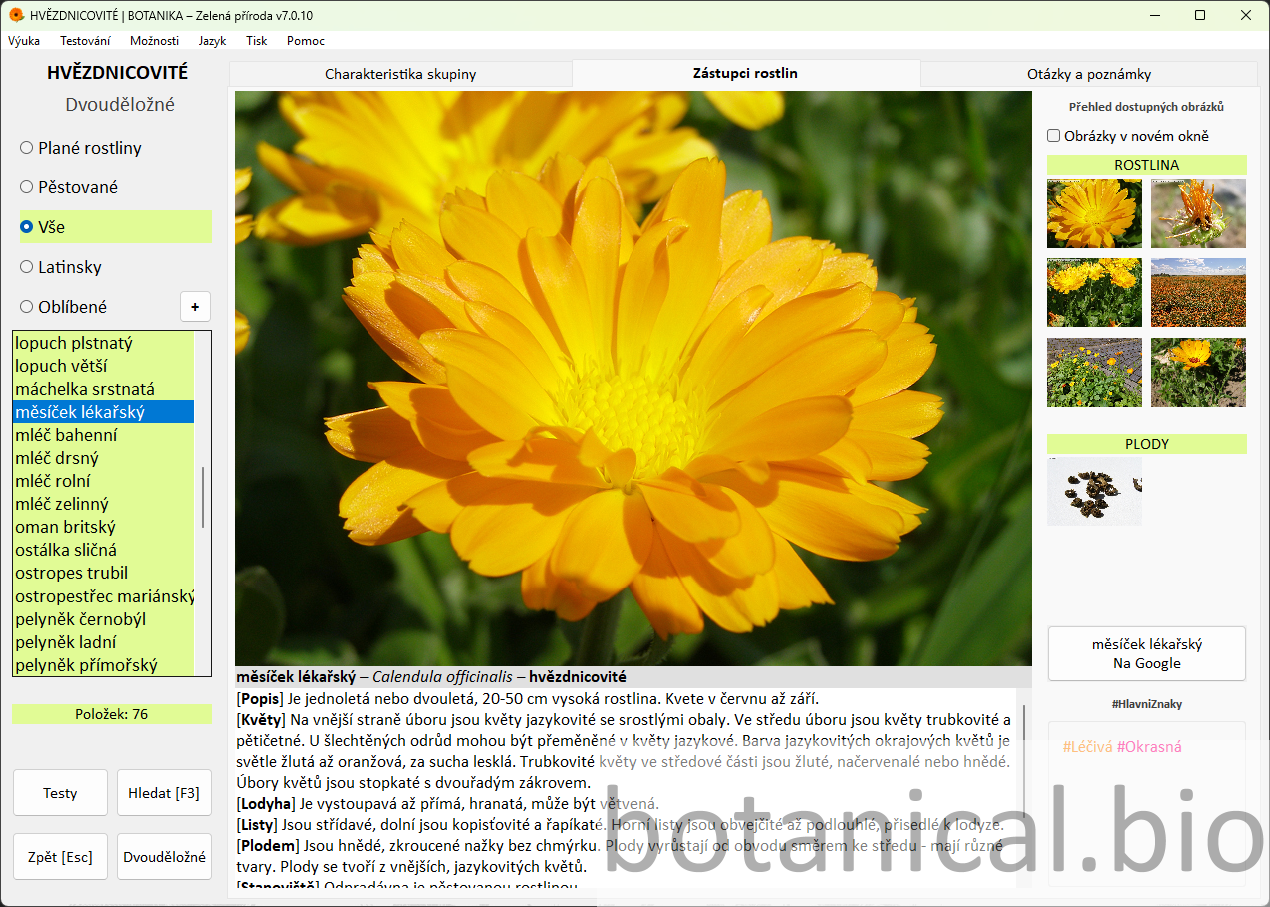
Students recognise selected representatives and understand their importance as ornamental, medicinal, and useful plants.

Modes

Option A – teacher-led instruction

The application is used only by the teacher on an interactive whiteboard or projector.

  • suitable for classes without individual devices
  • quick to implement without technical preparation
  • effective for explanation and whole-class testing

Option B – active student involvement

Students work independently or in pairs on their own laptops or tablets.

  • allows an individual pace of learning
  • suitable for active learning
  • supports pair and group work

Teacher tip

For most schools, the ideal approach is to combine both modes: begin with shared explanation on the board and then move on to independent student work. The same model can later be used for other plant families as well.

Flow

0–5 min Motivation

Introduction to the topic and activation of prior knowledge

The teacher introduces the lesson topic, briefly explains its aim, and activates students’ prior knowledge through a short guided discussion.

  • brief introduction of the topic and lesson aim
  • connecting with familiar plants
  • explaining how to work with the application
Questions:
• Which plants from this group do you know?
• Where have you encountered them?
Option A: The teacher projects the screen and leads a guided discussion.
Option B: Students open the topic and look for familiar representatives.
+ Advanced: After the opening discussion, let students name further representatives or their uses.
– Support: Focus only on 1–2 familiar representatives and a brief explanation of the topic.
The introductory chapter screen helps establish the lesson context quickly.
5–15 min Explanation

Characteristics of the family and key features

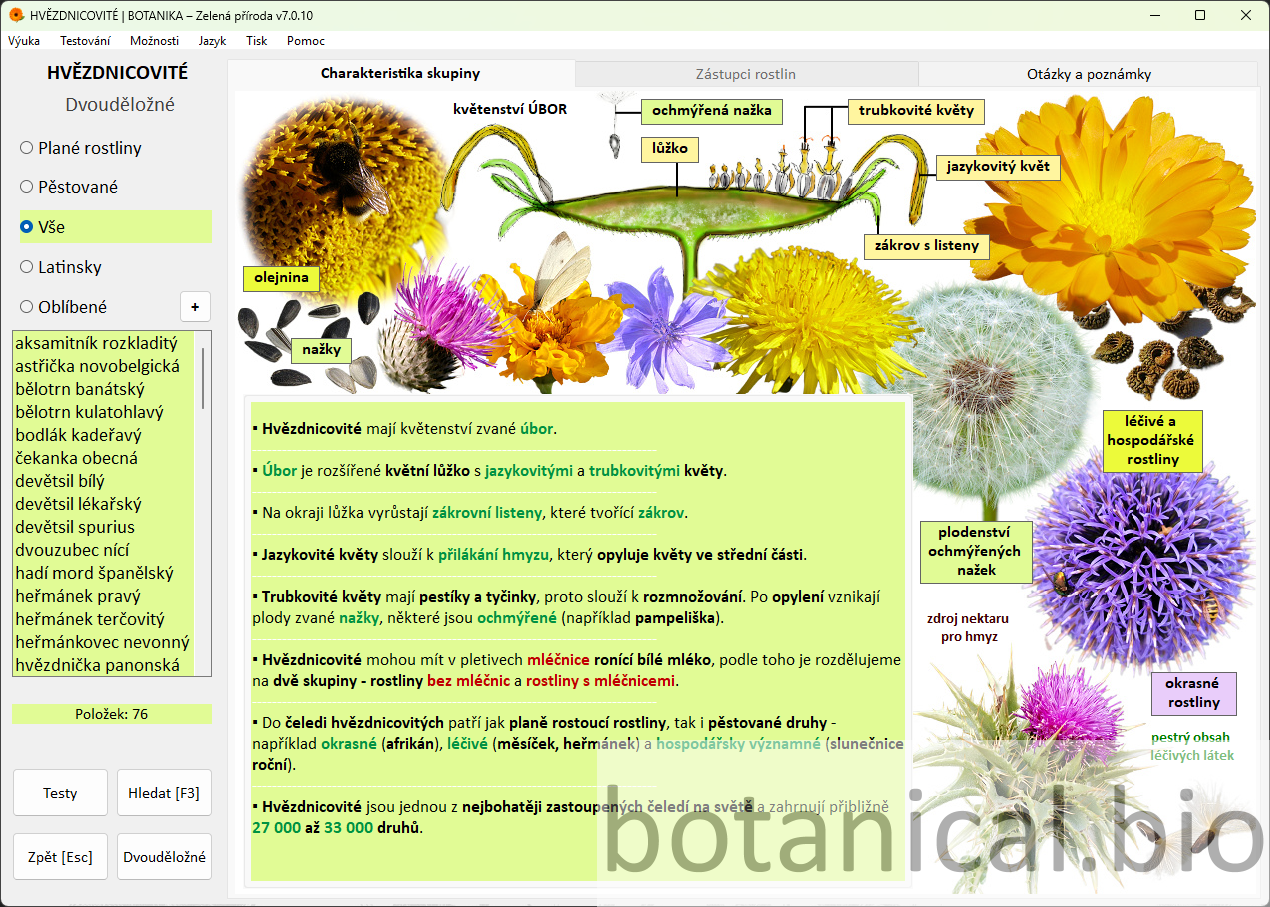
The teacher gradually explains the structure of the inflorescence (capitulum) and the main distinguishing features of Asteraceae plants. During the explanation, students are actively involved through observation-based questions.

  • explanation of terms (capitulum, ray florets, disc florets)
  • showing the features directly in the image
  • brief understanding check through questions
Questions:
• Which parts of the capitulum can you identify in the picture?
• How do ray florets and disc florets differ?
Option A: The teacher comments on the screen and involves students through questions.
Option B: Students identify features and write down terms.
+ Advanced: Extend the explanation by comparing this family with another one or by discussing the functions of individual flower parts.
– Support: Emphasise only the basic terms and let students identify visible features in the image.
The detailed group characteristics show the structure of the capitulum and its basic features.
15–20 min Representatives

Working with plant representatives

This phase focuses on specific representatives of the family, allowing students to connect theoretical knowledge with practical observation of plant features.

  • selection of representatives (dandelion, daisy, sunflower)
  • identification of features in the image
  • discussion of plant uses
  • comparison of species according to their features
  • comparison of two representatives
  • identification of the decisive feature for classification
  • explanation of differences between similar species
Questions:
• Which features of this plant confirm that it belongs to the Asteraceae family?
• What is the significance or use of this plant?
Option A: The teacher selects plants and comments on their features.
Option B: Students complete tasks such as “Find the plant based on the description”.
+ Advanced: Let students compare more representatives or look for further examples around the school or at home.
– Support: Focus on one or two representatives and summarise their main features together.
The representatives tab combines the main image, supplementary images, and descriptive text.
20–25 min Practice

Questions and notes

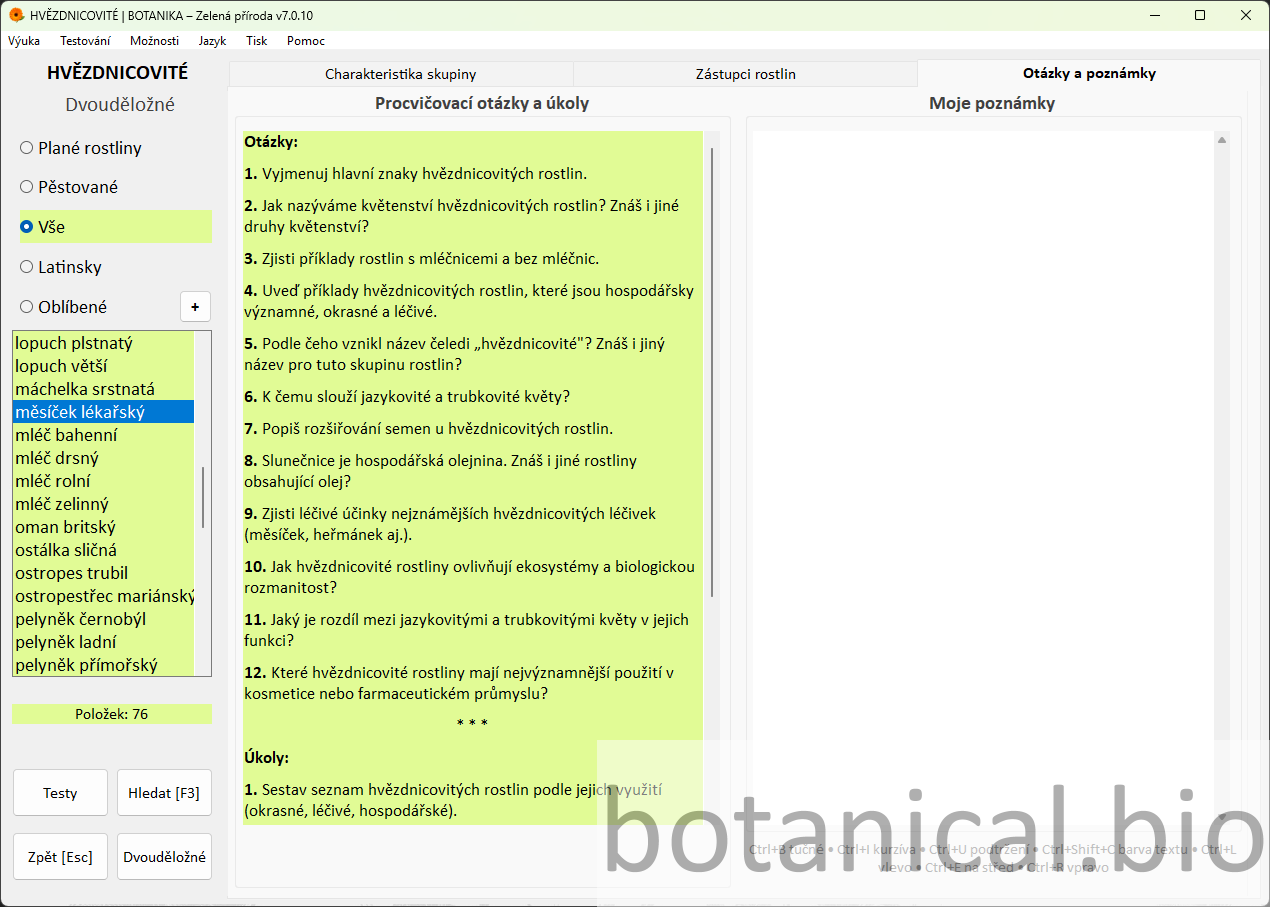
The teacher uses the Practice Questions and Tasks tab to check students’ understanding of the key terms and features.

  • selection of 3–4 questions
  • formulating answers in students’ own words
  • using notes
Questions:
• What is typical of Asteraceae plants?
• Which terms from today’s lesson will you remember?
Option A: Questions are discussed orally and the teacher involves the whole class.
Option B: Students write down brief answers or notes.
+ Advanced: Add an extra question or let students create their own question independently.
– Support: Choose only 2–3 questions and answer them together.
Questions and notes support active student work.
25–30 min Fun practice

Fun practice (memory game)

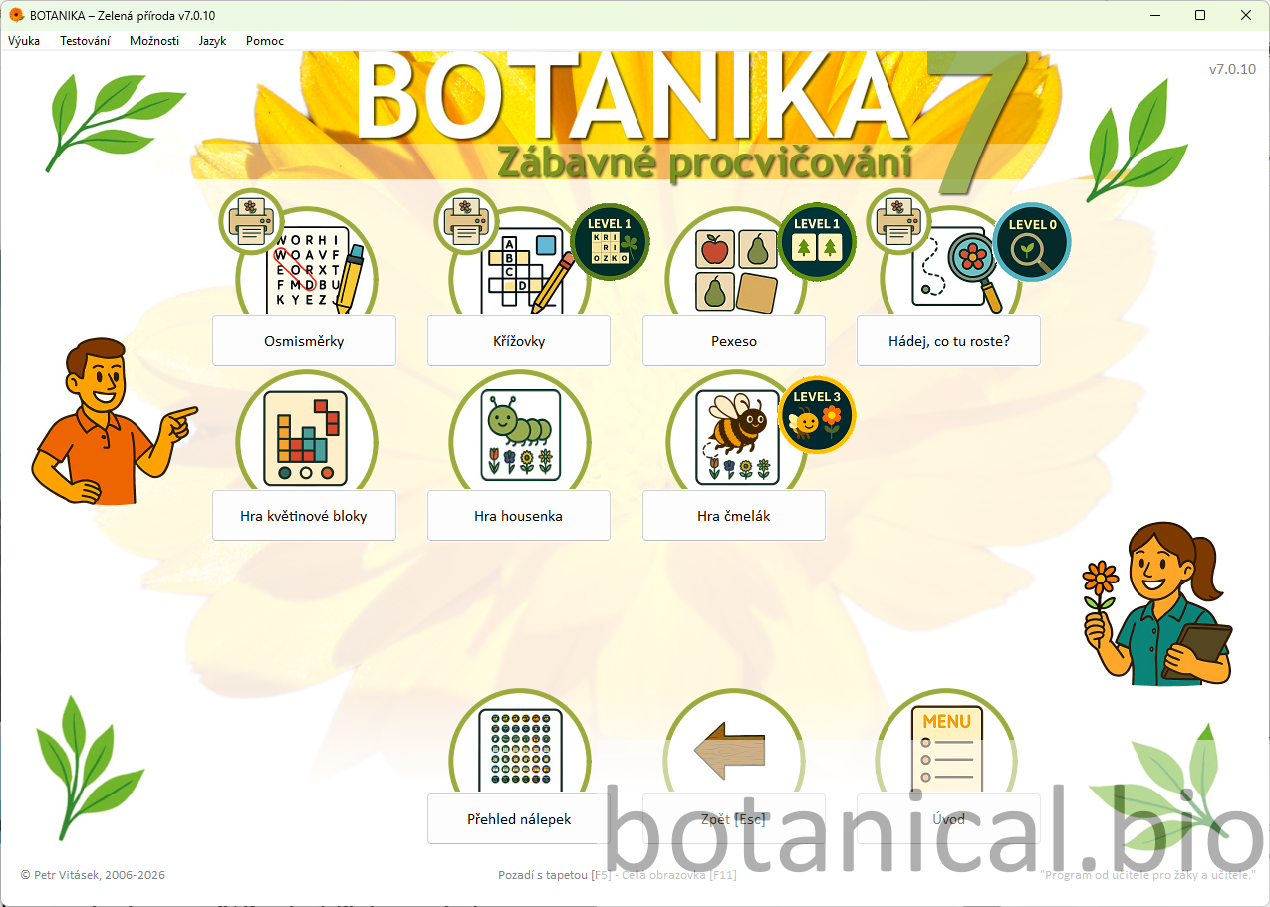
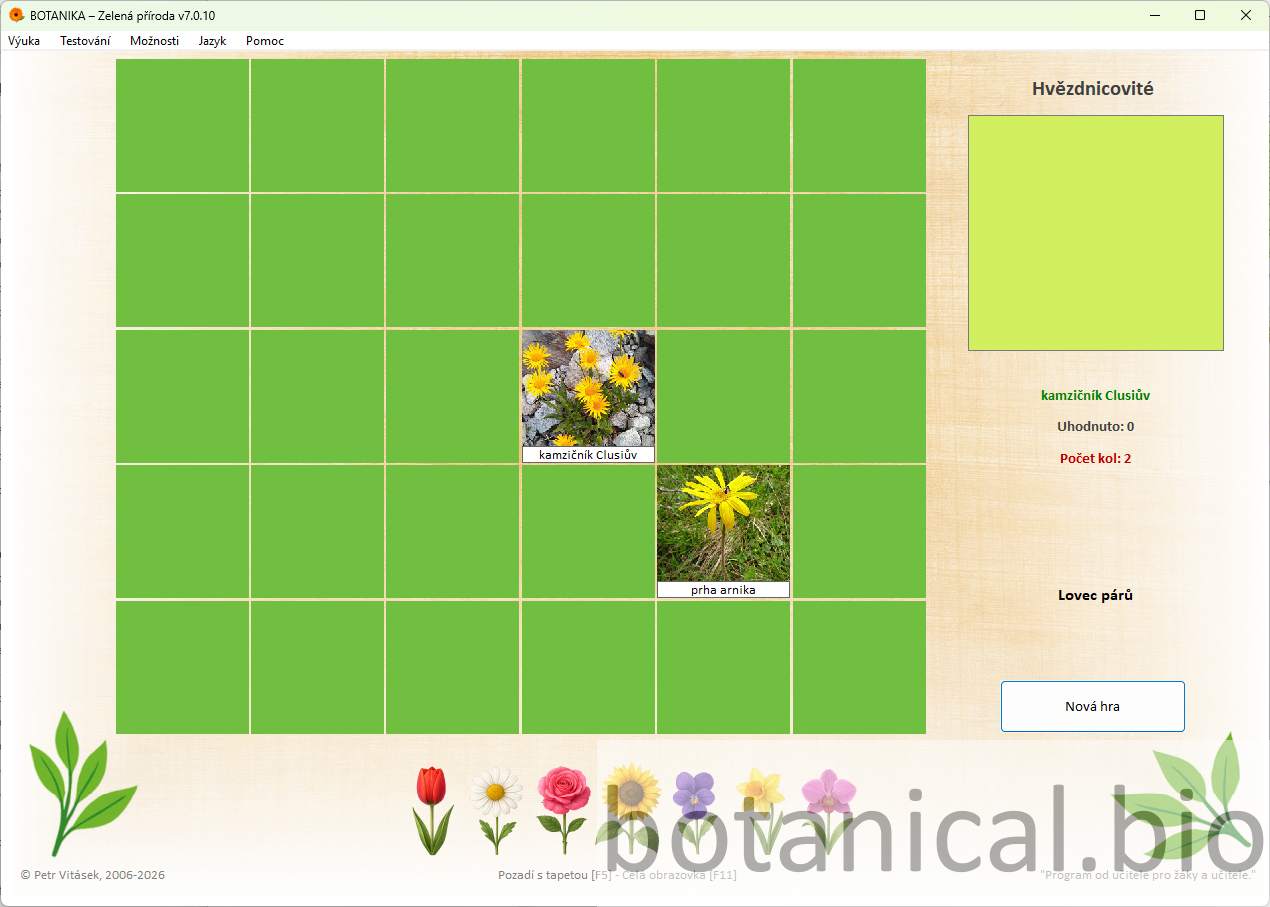
This short activating block uses game elements to strengthen plant recognition and refresh the pace of the lesson. The memory game can be complemented by further practice activities in the application or, for example, by creating a custom plant identification test in the test editor.

  • selection of a suitable activity
  • short practice session
  • student motivation
Questions:
• Which plants did you recognise correctly?
• What features helped you decide during the game?
Option A: The class plays together and the teacher manages the activity.
Option B: Students work independently or in pairs.
+ Advanced: Students can explain which plant features they used for recognition.
– Support: Use fewer pairs of cards or a shorter playing time.
The games menu shows different possibilities for practice.
The memory game helps reinforce plant recognition.
30–40 min Test

Knowledge check

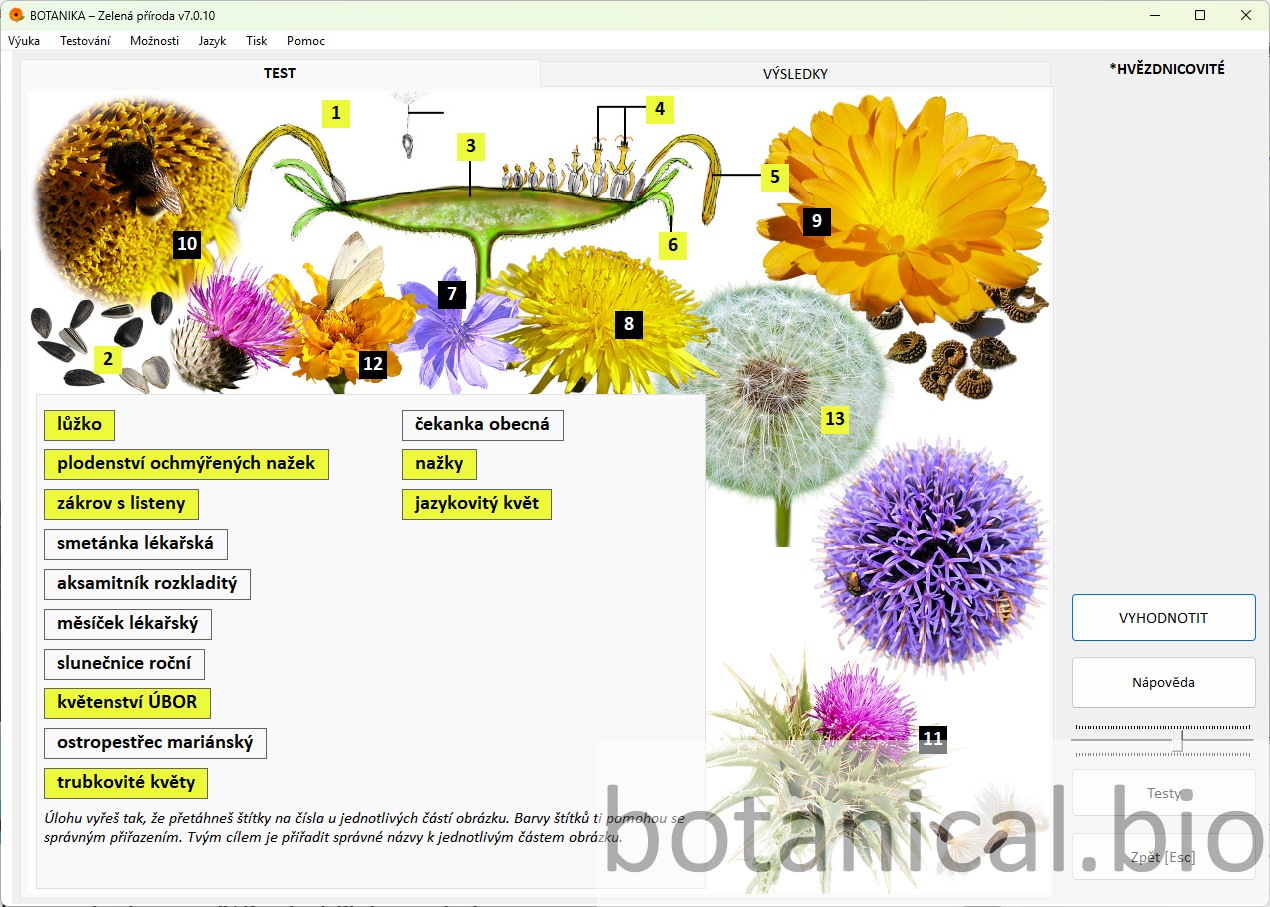
Students apply the knowledge they have gained through an interactive drag-and-drop test that checks understanding of key features and terms. While working on the test, students connect knowledge of plant features with orientation in the image and learn to recognise typical parts of the capitulum.

  • explanation of the test principle
  • matching labels
  • shared evaluation
Questions:
• Which feature helped you the most when solving the task?
• Where in the image is the required plant part located?
Option A: The test is completed as a class and the teacher comments on correct answers throughout.
Option B: Students complete the test individually, followed by whole-class feedback.
+ Advanced: After finishing the test, let students comment on the correct answers or repeat the test with a different task.
– Support: Go through the test together step by step and explain the solution continuously.
The test connects theory with visual observation.
40–43 min Botanical key

Demonstration of plant identification using the botanical key

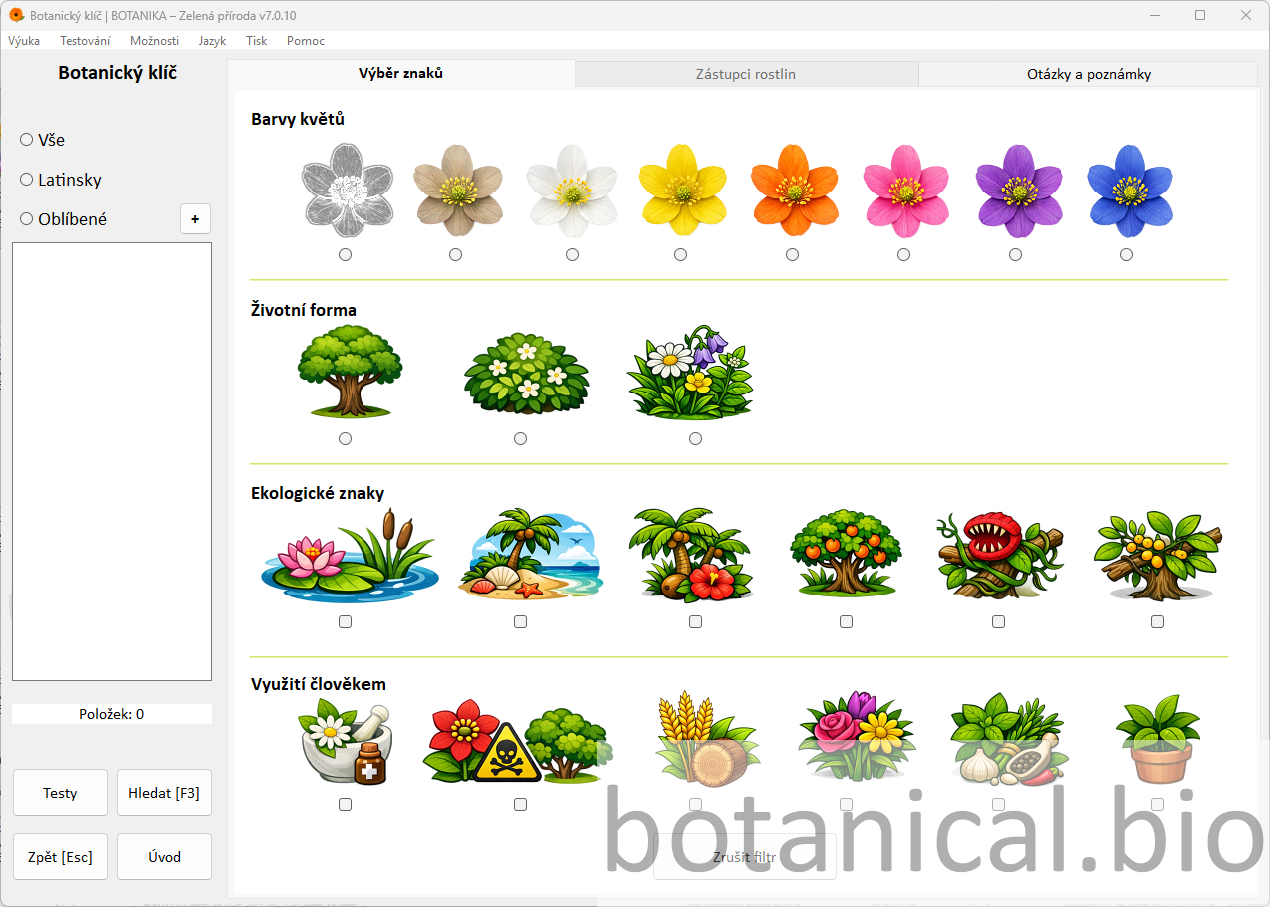
The teacher introduces the digital botanical key as a tool for identifying plants according to their features and thus extends the lesson through practical application of acquired knowledge.

  • demonstration of feature selection
  • filtering plants
  • species identification
  • brief discussion of the result
Questions:
• Which features did you use to identify this plant?
• Why did you choose these particular features?
Option A: The teacher demonstrates the principle of selecting features and identifies a plant together with the class.
Option B: Students identify a plant independently or in pairs according to its features.
+ Advanced: Let students identify another plant independently.
– Support: Proceed step by step together with the class.
The botanical key makes it possible to identify plants based on their features.
43–45 min Conclusion

Summary and reflection

The final part of the lesson is used to summarise the main features of Asteraceae plants and to briefly reflect on students’ work.

  • summary of key features
  • reflection
  • setting a follow-up task
Questions:
• What was new or surprising for you today?
• Which features of Asteraceae plants will you remember?
Option A: The summary takes the form of a guided discussion with the whole class.
Option B: Students complete a short reflection or write down the main takeaway from the lesson.
+ Advanced: Include a short extension activity – for example, looking for a representative around the school or at home.
– Support: Summarise only the most important points and let students name one term they remember.
Reflection can make use of questions and notes.

Tips

Combination with traditional explanation

The application can be effectively complemented by traditional board explanation or textbook work. For example, it is recommended to explain key terms first and then show them directly in the application.

Working with real examples

If possible, enrich the lesson with real plants, a herbarium, or photographs from the school surroundings.

Group work

Students can work in groups and solve tasks in the application together.

Follow-up homework

Assign a simple task – for example, to find a representative in the local environment.

Extension through independent research

More advanced students can search for information about selected plants and their uses and compare it with the content in the application.

Benefits

Everything in one place

Atlas, theory, questions, fun practice, test, and botanical key are all part of one environment.

Greater student engagement

Visual content and interactive elements support attention and active student participation throughout the lesson.

Flexible use

The guide can be used both in whole-class teaching and during independent student work.

Try Botanika

The Botanika – Green Nature application enables teachers to deliver a visually rich and engaging lesson without demanding preparation. This teaching guide serves as a foundation that can easily be extended to other plant groups.